Filed under: Recipes
I recently hosted a book club discussion at my house for six guests. The host provides light snacks and beverages, and I of course took it upon myself to create a diverse and flavorful menu of items to serve. I spent at least a week considering various appetizers and small plates that would make for good finger food and would also accommodate a number of food intolerances. I had a great time planning my prep schedule (made even better by a gorgeous weekend of warm sun and a nice breeze passing through the open windows) and spent a good many hours in the kitchen the day before. It was well worth it; my guests were delighted, as was I.
Because I served quite a few items, I will share the recipes here a couple at a time.
I decorated the table with the requisite tulips in a large mason jar.

I found these great inexpensive salad plates by Zak! Designs at my local Fred Meyer.

I’m a recent convert to homemade sweet iced tea, and since the weekend was so gorgeous I knew I wanted to make a pitcher for the gathering. I prefer a tropical white tea blend or Celestial Seasonings’ Red Zinger herbal tea. You could use basically anything, including standard Lipton tea.
Sweet Tea
Bring 4 cups water to a roaring boil. Add 1 cup sugar and stir until fully dissolved. Turn off the heat. Add three to four tea bags of your choice to the pot, stir, and let steep for at least 20 minutes. Remove the tea bags, pour the tea into a pitcher, fill with cold water and ice, and refrigerate until ready to serve.
Alternatively, you can follow these directions, which I will try next time: Coat the inside bottom of a medium pitcher with honey. When the water comes to a boil, pour a little into the pitcher to dissolve the honey. Add three or four tea bags into the pitcher and fill it 2/3 full with hot water. Steep for at least 20 minutes. Remove the tea bags, fill the pitcher with ice, then refrigerate until ready to serve.

I wanted to serve nuts without paying a premium price for the pre-seasoned packages (which tend to be too salty anyway), so I bought unsalted raw cashews in bulk and tried out the following recipe. They were delicious, though I found that 20 minutes was about 5 minutes too long in the oven—a number of the cashews tasted almost burnt. The recipe as written is a little on the spicy side, so be prepared for a kick, or adjust the seasoning according to your palate.
Caramelized Cashews with Cayenne
Nonstick vegetable oil spray
2 cups (about 10 ounces) unsalted natural cashews
1/4 cup pure maple syrup (preferably Grade B)
1/2 teaspoon ground cumin
1 teaspoon fine sea salt
1/2 teaspoon cayenne pepper
Preheat the oven to 350 degrees F. Spray a sheet of foil with nonstick spray; set aside. Lightly spray a rimmed baking sheet with nonstick spray. Toss the cashews, maple syrup, cumin, salt, and cayenne in a medium bowl. Spread cashew mixture evenly in single layer over prepared sheet.
Bake cashews until golden brown and coated with maple syrup mixture, stirring occasionally, about 20 minutes [I advise you check them at 12 minutes and watch closely]. Immediately pour nuts out onto prepared foil, spreading evenly. Cool 10 minutes, then separate and break apart any nut clusters. Cool completely before serving.

I’ve been a little busier than I thought I might be, so I haven’t come up with a final list for my mock cookbook, meaning it is unlikely I will have it finished by July as originally hoped. However, I do still want to take advantage of the long summer days and limit my deadline extension, so my revised goal is to finish the project by the start of September. I have been gathering unique dishes, napkins and place mats, and other accessories for my styling and setups, so I feel pretty prepared in that regard. I will also be attending a food photography workshop in the next month (more on that later) and have just purchased a highly recommended tabletop light source for fill and low light situations. In the meantime, I will continue to keep my eye out for a variety of recipes that will photograph well.
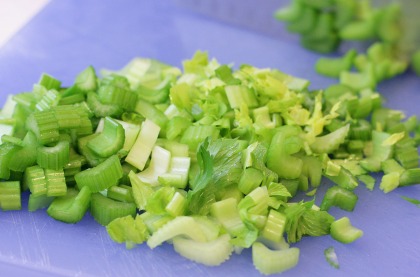
This lovely green celery soup is one such recipe. It is composed of inexpensive ingredients, takes little hands-on time to prepare, and has a fresh, bright flavor. If you’re concerned it will taste like a big bowl of puréed raw celery, don’t be. It has a base of celery, sure, so if you absolutely can’t stand the vegetable this may not be for you, but the soup’s flavor is more complex and satisfying than you might expect. This make a great first course as a light summer soup, and naturally, I suggest pairing it with Brie Green Onion Toasts, especially if you serve the soup as a main course.
Celery Soup with Dill Swirl
2 teaspoons olive oil
6 green onions, chopped
4 cups chopped celery with leaves (about 1 pound)
4 cups reduced-sodium chicken broth or vegetable broth
2 medium white-skinned potatoes, peeled and cut into 1-inch pieces
1/4 teaspoon celery seeds
3 tablespoons heavy cream
Salt and freshly ground black pepper
2 tablespoons plain nonfat yogurt or crème fraîche
1 teaspoon minced fresh dill or tarragon plus 6 sprigs for garnish
Heat the oil in a large pot over medium-high heat. Add the green onions and sauté for 2 minutes. Add the celery and leaves, chicken broth, potatoes, and celery seeds; bring to a boil. Reduce the heat to medium; cover and simmer until vegetables are tender, about 15 minutes.
Using an immersion blender, purée the soup until smooth. Alternatively, purée in batches in a blender, then return the soup to the pot. Place pot over low heat to keep warm. Stir in heavy cream. Season to taste with salt and pepper.
Mix the yogurt and dill in a small bowl. Drizzle each soup serving with the yogurt mixture. Garnish with dill sprigs and serve immediately.


Filed under: Recipes
At last I share the simple and utterly delicious accompaniment for soups and salads or an indulgent snack on its own, a brilliant combination dreamed up by M, who is perhaps even a bigger Brie fanatic than I am. She has long been sautéing and baking Brie wedges or rounds with butter and green onions, and then spreading the oozing cheese on crusty bread slices by the mouthful, washing it all down with a crisp glass of white wine (Chateau Ste. Michelle Riesling is her top choice). It’s divine. From that she had the idea to create crispy baked toasts topped with Brie slices and green onions to pair with an uber-healthy celery soup (recipe to come).
The toasts really couldn’t be easier to put together and are great for parties because the presentation and flavors are quite elegant. You can also make just a few at a time since there is little prep and cleanup involved. It’s hard not to want to eat them with every meal!
You’ll need:
3 or 4 peeled garlic cloves
3 or 4 tablespoons olive oil
1 loaf of crusty artisan bread
1 large wedge or small round of Brie
1 bunch green onions
First smash the garlic cloves and steep them in the olive oil in a small bowl. Let the mixture sit while you prepare the other ingredients. Alternatively, you could mince the garlic or use garlic paste to infuse the olive oil.
Preheat the oven to 300 degrees F.
Slice the bread into about 1/2-inch-thick slices (cutting in half or quarters if you are serving a large group) and assemble on a baking sheet. On a cutting board, slice the Brie into pieces that match the size of the bread slices. Chop or thinly slice the green onions.
To assemble, brush the bread with the garlic-infused oil. Bake in the oven until the bread is getting crisp but not dry, 5 to 6 minutes. Switch the oven to broil.
Top the toasts with the Brie slices, brush again with the oil, then sprinkle with green onions. Alternatively, you can top with the green onions immediately after broiling. Place the toasts under the broiler until the Brie is melted, about 2 minutes.


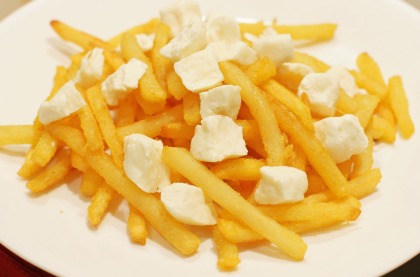
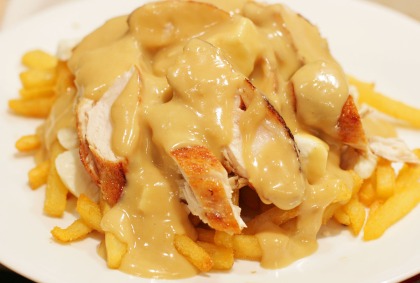
Poutine. How delicious you are. This is another City Arts recipe I was lucky enough to test. The gravy is possibly the best I’ve ever had, and therefore is worthy of being posted here too. I absolutely encourage you to make poutine or mashed potatoes or turkey or anything that gives you an excuse to make this gravy!
Poutine Gravy
2 1/2 cups chicken stock
2 tablespoons flour
2 tablespoons butter
2 eggs yolks, lightly beaten
2 tablespoons cream
Heat the stock in a pot until just simmering. In a large pan over medium-low heat, whisk together the flour and butter until the flour dissolves and the mixture bubbles. Carefully pour the stock into the roux, a little at a time, whisking constantly. Once the stock is fully incorporated, increase the heat to just under medium. Let the sauce cook for 30 minutes until it has lost its floury taste and reduced slightly.
In a medium bowl, whisk together the egg yolks and cream. Temper the mixture by adding small amounts of the the warm sauce into the eggs while whisking constantly. Once about half of the sauce has been added to the eggs, return the sauce to the stove and slowly whisk the egg mixture back into the sauce until it is fully incorporated. Set over low heat to keep warm. Do not let it boil.
*To push the gravy over the edge, sear a skin-on chicken breast in 1 tablespoon olive oil over high heat in a sauté pan. After the chicken is browned on all sides (finish cooking in the oven), deglaze the pan with a few tablespoons of white wine. Scrape up the brown bits and let the wine cook down for a minute. Pour the pan drippings into the gravy and whisk to combine. Amazing!
(Full recipe and select photos here.)


I served the poutine with:
Roasted Asparagus and Arugula Salad with Shallot Vinaigrette
The dressing is great! You could also add sautéed mushrooms to enhance this salad.
1/3 cup minced shallots (about 2 large)
2 tablespoons fresh lemon juice
2 tablespoons sherry wine vinegar
2 teaspoons grated lemon zest
1 1/2 teaspoons Dijon mustard
1/3 cup extra-virgin olive oil
Salt and freshly ground black pepper
1 pound slender asparagus, ends trimmed
6 cups lightly packed arugula (about 5 ounces)
3 tablespoons chopped fresh chives
1/2 cup freshly grated Parmesan cheese
Whisk the shallots, lemon juice, sherry, lemon zest, and mustard in small bowl to blend. Gradually whisk in oil. Season vinaigrette to taste with salt and pepper.
Preheat the oven to 400 degrees F. Place the asparagus on a rimmed baking sheet. Drizzle 1/4 cup vinaigrette over the spears and turn to coat, then spread out in a single layer. Sprinkle with salt and pepper. Roast asparagus until just crisp-tender, about 12 minutes.
Combine the arugula, chives, and asparagus in a large bowl. Add the remaining vinaigrette and toss to coat. Transfer salad to platter; sprinkle with salt, pepper, and cheese. Serve warm or at room temperature.

Filed under: Books
Continuing with my checking out cookbooks from the library to determine their merit and potential for a permanent spot in my cookbook collection, I recently finished reading through The Frugal Foodie Cookbook. This cookbook was put together by Alanna Kaufman and Alex Small, two students who blog about creating “foodie” meals for less money on their site, Two Fat Als. While I’m not a reader of their blog (they rarely post new content, and I don’t find the site all that compelling), they have compiled quite a number of recipes over the years.

As for the cookbook, I’ll focus on the positives, though I wouldn’t give it a wholehearted recommendation. Overall I found that this cookbook is best for students and others who may not have much money or time but want something more than takeout or freezer meals, and especially those who are newer to the kitchen. All of the recipes are a single page and quite uncomplicated. I think this may have been good to have around when I was in college myself, just learning the cooking ropes and having to stretch my dollar a long way (but not knowing how). Now, however, I was only drawn to about ten recipes, most of which can be had via Epicurious and elsewhere.
The headnotes aren’t very inspiring nor the recipes all that groundbreaking, but the book is inexpensive and includes some decent basics. (You should pretty much ignore their cost-per-meal/serving calculations though . . . I found quite a few errors in that regard.) If you are a fairly adept cook, scan the list of recipes on their website (or check the book out at the library as I did), but spend your cookbook money elsewhere.
Some recipes I jotted down (a few of which can be found on their blog):
- Grilled Peach and Shrimp Crostini
- Gorgonzola Pizza with Radicchio and Asian Pears
- Miso and Scallion Salmon Burgers
- Roasted Red Pepper Soup
- Butternut Squash and Apple Soup
- Banana-Chocolate Muffins
Filed under: Recipes
This is a recipe I’ve had on a scrap of paper for quite a few years now, and I don’t recall its origins, but it is a perennial favorite of mine. This is a creamy, crunchy, flavorful, and filling salad. It tastes great days later and is a perfect choice for making on a Sunday for weekday lunches. It also packs up really nicely for picnics and is a potluck crowd-pleaser.
Usually I think to make this when I have a bag of red grapes in the fridge (or see a really nice bunch in the grocery store and get inspired) because I can never eat them fast enough. If I’ve planned ahead, I will bake a few chicken breasts the night before making the salad and then just chop and toss them in as I prepare the full recipe. A couple of times I’ve purchased a rotisserie chicken and shredded the meat into the salad. Both versions turn out great, though the texture of the latter is more like stringy chicken salad from a deli and the former is more structured with its firm chicken bites.
My preference is to eat the salad as is, but I also enjoy it on a bed of lettuce (arugula or romaine are nice) and occasionally on a sandwich roll.
Curry Chicken Salad
This recipe lends itself to so many modifications. You can make it with 3 cups diced ham and 3 cups chicken. You can add water chestnuts, bell peppers, or other fruit, such as pineapple or mango. I’ve made it with cashews in place of the almonds with great results. You could even experiment with using less mayonnaise (or none at all) and dressing it with a vinaigrette, though I personally love the seasoning as written. This will easily serve 6 as a lunch entrée.
1 large apple, chopped
1 tablespoon lemon juice
6 cups diced chicken
1 cup silvered almonds, toasted
1 cup sliced celery
1 cup red grapes, halved
4 green onions, chopped
1 1/4 cups mayonnaise
1 1/2 teaspoons soy sauce
1 teaspoon curry powder
In a large bowl, toss the apple in the lemon juice. Add the chicken, almonds, celery, grapes, and green onions. Mix thoroughly.
In a small bowl, blend the mayonnaise, soy sauce, and curry powder. Stir into the salad until well coated. Let the salad sit for at least 30 minutes or refrigerate overnight. Toss before serving plain in bowls, over romaine lettuce, or on sandwich rolls.


Filed under: Recipes
This post is very delayed in coming, but better late than never, right?
M suggested Pad Woon Sen for one of our photo nights because it is a favorite of hers when ordering Thai. She introduced me to this scrumptious noodle dish one evening and then suggested we try to recreate it ourselves. The lightly stir-fried tomato wedges are a major highlight for both of us—if you haven’t paired warmed tomatoes with your Thai noodles, you don’t know what you’re missing.
There are quite a few recipes out there for Pad Woon Sen, but the basic ingredients are cellophane noodles, eggs, onions, carrots, mushrooms, protein, and fish sauce. We started with the following recipe from the Thai Kitchen and added a few vegetables we like best. The savory, salty seasoning paired with smooth noodles and soft vegetables makes for a great, healthy meal. The possibilities are endless!
Pad Woon Sen
3 tablespoons vegetable oil
6 cloves garlic, chopped
1 cup sliced mushrooms
1/2 small onion, peeled and sliced into thin strips [We also added 1 shallot, thinly sliced]
8 ounces cellophane noodles, soaked in hot water* and cut into 4-inch lengths
2 eggs
1 1/2 cups firm tofu or other meat, cubed
1 cup bean sprouts
1 cup sliced celery
1 cup julienne carrots
2 cups chopped Napa cabbage
4 green onions, white and green parts sliced into 1-inch pieces
4 Roma tomatoes, quartered
2 tablespoons fish sauce
2 tablespoons lime juice
1 teaspoon freshly ground black pepper
Sesame seeds
Heat the oil in a large wok over high heat. Add the garlic and sauté until golden. Add the mushrooms and onions. Stir-fry until the onions have wilted, about 4 minutes. Add the noodles and toss. Make a hole in the center of the mixture and break in the eggs. Slowly stir the eggs just until set, then break them up and mix with the noodles. Stir in the tofu, sprouts, celery, carrots, cabbage, green onions, and tomatoes; cook until vegetables are heated through, about 3 minutes.
Season with fish sauce, lime juice, and pepper to taste. Sprinkle with sesame seeds and serve immediately.
*Soak noodles in hot water or stock for a few minutes until they are soft but firm, not mushy. Drain with cold water before cooking.


Filed under: Recipes
This is a great way to enjoy fresh vegetables from the farmers market, grocery store, or your CSA delivery. The flavor of the produce really shines through with the simple, creamy sauce. I really enjoyed this refreshing pasta dish, best served hot off the stove. And hey, look at that—there are those Brie Green Onion Toasts again.
Spring Vegetable Carbonara
1/2 cup frozen green peas, thawed
12 ounces asparagus, trimmed and cut into 1-inch pieces
8 ounces uncooked fusilli or cavatappi pasta [I used mini fusilli]
3/4 cup (3 ounces) grated Parmigiano-Reggiano cheese
1/2 teaspoon kosher salt
1/2 teaspoon freshly ground black pepper
4 large eggs, lightly beaten
1 tablespoon olive oil
4 slices prosciutto or center-cut bacon, chopped
1 cup chopped seeded red bell pepper
1 cup chopped cremini mushrooms
Cook the peas and asparagus in boiling water for 3 minutes or until asparagus is crisp-tender; drain. Plunge into ice water; drain. Cook the pasta according to package directions. Drain the pasta in a colander over a bowl, reserving 1/4 cup of the cooking liquid. Combine the pasta, peas, and asparagus.
Combine the cheese, salt, pepper, and eggs in a bowl, stirring well with a whisk. Gradually add the reserved hot cooking liquid to the mixture, stirring constantly with a whisk.
Heat the oil in a large skillet over medium heat. Add the prosciutto and sauté until crisp, stirring occasionally. Remove the prosciutto from the pan, reserving the drippings. Add the prosciutto to the pasta mixture. Cook the bell pepper and mushrooms in the pan drippings for 3 minutes, stirring occasionally. Add the pasta mixture to the pan; cook for 1 minute or until thoroughly heated. Remove the pan from the heat, and stir in the egg mixture. Return the pan to low heat; cook for 2 minutes or until the sauce thickens slightly, stirring constantly. Serve immediately.


Filed under: Recipes
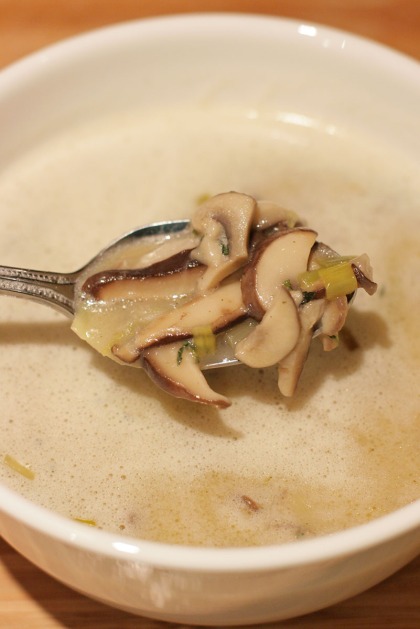
Soup and I are best friends, which isn’t to say I’m not picky about which soups I will allow into my life, but I can usually tell by a quick glance at the ingredient list whether or not I’ll be in it for the long haul. This is one such soup. A few weeks ago I was searching Epicurious.com for some good mushroom recipes and came across this mushroom and leek soup. I may have said it before, and I’m sure I will again, but I swoon for the combination of mushrooms with thyme; add a couple of leeks, some chicken broth, and a little cream to round it out, and I’m sold.
I made this recipe as written aside from one modification—I used a combination of cremini and shiitake mushrooms (about a 3 to 1 ratio). After having made the soup (and thoroughly enjoying it), I have two comments. The first is that whipping the cream is completely pointless aside from presentation purposes. It melts upon contact with the hot soup, so all the time spent whipping is for naught come time to eat. Therefore I recommend just steeping the thyme in the unwhipped cream for a couple of hours as the recipe calls for and then stirring 1 tablespoon or so into each bowl of soup as it is served. My second note is that this is absolutely fantastic after sitting for a few hours or overnight. Prepare it the day before serving if you can (up to the point of adding the cream of course) and then reheat later.
I served this with a salad and Brie Green Onion Toasts, which deserved a post all their own . . .
Mushroom and Leek Soup with Thyme Cream
1/2 cup heavy cream
3 teaspoons chopped fresh thyme, divided
6 tablespoons (3/4 stick) unsalted butter, divided
2 pounds cremini and shiitake mushrooms, cut into 1/4-inch-thick slices (about 10 1/2 cups)
3 large leeks, white and pale green parts only, cut into 1/4-inch dice (2 1/2 cups)
6 tablespoons all-purpose flour
6 cups chicken stock or canned low-sodium chicken broth
1 1/2 teaspoons salt
3/4 teaspoon freshly ground black pepper
Using electric mixer, beat the cream just until soft peaks form. Fold in 2 teaspoons of the thyme. Cover and refrigerate at least 2 hours to blend flavors. (Thyme cream can be made up to 1 day ahead.) Remove from the refrigerator 1 hour before serving to come to room temperature.
In a 4-quart stockpot over medium-high heat, melt 2 tablespoons of the butter until hot but not smoking. Working in 2 batches (add 2 more tablespoons butter before second batch), cook mushrooms, stirring occasionally, until lightly browned, about 8 minutes. Transfer to large bowl.
In the same stockpot over medium heat, heat the remaining butter. Stir in the leeks, cover, and cook, stirring often, until soft, about 5 minutes. Add the cooked mushrooms, sprinkle with flour, and stir until the flour is evenly distributed. Stir in the stock, then the salt, pepper, and remaining thyme. Bring to a boil, stirring often, then reduce heat to low, set the lid ajar, and simmer for 20 minutes. (The soup can be made up to 2 days ahead and refrigerated, covered. Reheat before serving.)
Divide the soup among 8 bowls and top each portion with dollop of thyme cream. Serve immediately.
