Filed under: City Arts
My latest City Arts assignment was a beverage, and a good (and strong!) one at that.
I enjoyed approaching this variation on food photography. I’m pleased with the final shots, and my favorite is either the last photo (that twist is perfect!) or the second one.


Filed under: Recipes
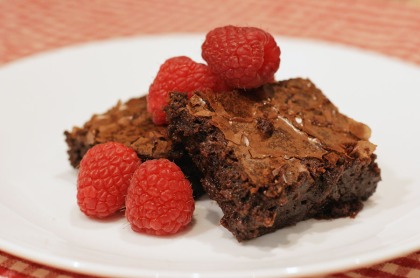
Brownies are one of my favorite baked desserts. As soon as I saw this post featuring the famed brownie recipe from Matt Lewis’s cookbook, Baked: New Frontiers in Baking, I had to give it a try. Pairing them with raspberries put these brownies over the edge for me. When slightly undercooked, they have a consistency similar to fudge.
These were also fun to photograph. I think I like the second and fourth photos best.
Baked Brownies
1 1/4 cups all-purpose flour
1 teaspoon salt
2 tablespoons dark unsweetened cocoa
11 ounces dark chocolate, coarsely chopped
1 cup (2 sticks) unsalted butter, cut into 1-inch pieces
1 teaspoon instant espresso powder [I omitted this]
1 1/2 cups granulated sugar
1/2 cup firmly packed light brown sugar
5 eggs at room temperature
2 teaspoons vanilla extract
Preheat the oven to 350 degrees F. Butter the sides and bottom of a 9-by-13-inch glass or light-colored metal baking pan.
In a medium bowl, whisk together the flour, salt, and cocoa.
In a double boiler, melt the chocolate, butter, and instant espresso powder, stirring occasionally, until completely melted and smooth. Turn off the heat. Whisk in the sugars. Add 3 of the eggs to the mixture and whisk until combined. Add the remaining eggs and whisk until combined. Stir in the vanilla.
Sprinkle in the flour mixture and fold into the chocolate until combined. Pour the batter into the prepared pan and smooth the top. Bake in the center of the oven for 28 minutes, rotating the pan halfway through baking time, until a toothpick inserted in the center comes out with moist crumbs.



Filed under: Recipes
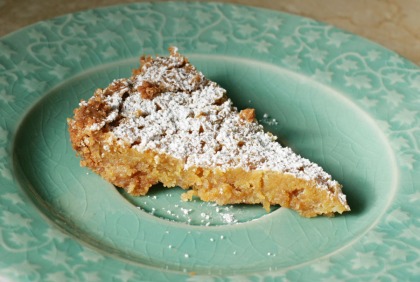
I’m posting about this pretty late (relative to when it was news and when I actually made the pie), so you may have heard about it. According to an L.A. Times article, there is a dessert that has swept the nation, and New York City specifically: Crack Pie. I know little about Momofuku beyond having flipped through the cookbook, but, being a lover of sweets, I was curious about the attention this treat was getting. Especially with a price tag of $44 for something made with exceedingly common ingredients.
Lucky for me (and everyone else), I neither had to shell out the cash for a trip to NYC nor arrange for home delivery to give this publicized pie a try. In all honesty, I wasn’t that curious, and I wouldn’t have even given it a second thought if the recipe hadn’t been provided as part of the feature story. I greatly appreciate when restaurants/chefs are willing to let the home cook try and recreate a famous (or not) dish rather than keeping the recipe under lock and key. There are certainly times when doing so is necessary to the business’s livelihood, but in general, I don’t expect most places will have to close their doors just because a handful of ambitious home cooks take on the task themselves.
Such is the case here. I highly doubt many will bother to spend nearly three hours prepping and baking (the stated estimate of half that time may be true for professionals, but it took me quite a bit longer), even though the total cost is likely to come in under $10 for what might not already be your home pantry. Is it worth it? On occasion.
While I probably wouldn’t pay $44 for any pie, let alone one I can put together at home, there’s no doubt that Momofuku has the process down pat and can turn out a more amazing version than I can. I’m sure their oats, powdered milk, cream, butter, etc. are top of the line and make a big difference in the final product. And this pie is definitely tasty, though exceedingly sweet. I’m still more in love with other desserts though, so while I might make Crack Pie again someday, it won’t be a part of my regular circulation.
I did have some trouble. The baking time in the original recipe was off for both of my pies. The first pie I could tell wasn’t done even after an additional ten minutes in the oven, but I had planned to take it to a dinner, so I pulled it out and let it cool as much as it could before leaving. Yet by arrival time it was a gooey, unset mess. We still tried pieces for the sake of tasting it, but it was definitely runny. The second pie I cooked quite a bit longer, but it also wasn’t quite right (the center just kept boiling in the oven and did not set well). Lorna Yee of The Cookbook Chronicles modified the recipe to make a single pie and also adjusted the cooking time, and it sounds like her recipe is better, so I will follow it in the future.
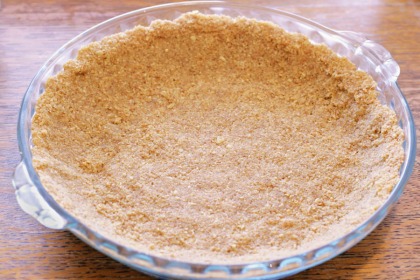
The crust, however, is worthy of making over and over again. You bake a large sugar-and-oats sheet cookie, which is then crumbled and combined with more sugar and butter before being pressed into the pan. Oh is it good. I definitely recommend preparing the crust recipe as written to use for just a single pie or cheesecake rather than two (per the original recipe)—it was quite sparse divided in half.
Since the crust is perfect for other recipes, I have included it here, but I direct you to follow Lorna’s instructions for the Crack Pie filling and baking if you choose to prepare it in full.
And if you do try it at home and it wins your heart as a favorite indulgence, why not buy the real thing and compare? In any case, enjoy!
Momofuku’s Crack Pie Crust
Cookie for crust
2/3 cup plus 1 tablespoon (3 ounces) flour
Scant 1/8 teaspoon baking powder
Scant 1/8 teaspoon baking soda
1/4 teaspoon salt
1/2 cup (1 stick) softened butter
1/3 cup (2 1/2 ounces) light brown sugar
3 tablespoons (1 1/4 ounces) sugar
1 egg
Scant 1 cup (3 1/2 ounces) rolled oats
Preheat the oven to 375 degrees F.
In a medium bowl, sift together the flour, baking powder, baking soda and salt.
In the bowl of a stand mixer using the paddle attachment, or in a large bowl using an electric mixer, beat the butter and sugars until light and fluffy.
Whisk the egg into the butter mixture until fully incorporated.
With the mixer running, beat in the flour mixture, a little at a time, until fully combined. Stir in the oats until incorporated.
Spread the mixture onto a 9-by-13-inch baking sheet and bake until golden brown and set, about 20 minutes. Remove from heat and cool to the touch on a rack. Crumble the cooled cookie to use in the crust.
Crust
Crumbled cookie for crust (recipe above)
1/4 cup (1/2 stick) butter
1 1/2 tablespoons (3/4 ounce) brown sugar
1/8 teaspoon salt
Combine the crumbled cookie, butter, brown sugar, and salt in a food processor and pulse until evenly combined and blended (a little of the mixture clumped between your fingers should hold together). Press the crust into a pie pan to form an even layer along the bottom and sides. Proceed with Crack Pie filling and baking instructions or a favorite cheesecake recipe.


Filed under: Recipes
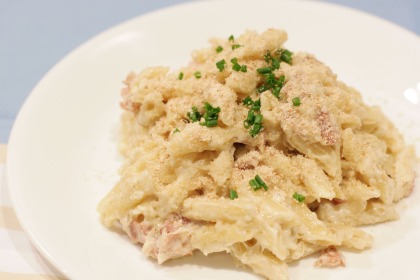
I have made quite a few recipes from the exceptional Newlywed Kitchen, and this macaroni is definitely a favorite. Lorna Yee always puts together glorious recipes; I visit her site for outstanding dishes on a regular basis.
How can you go wrong with four cheeses? My only revision to the recipe is in place of bacon I prefer lightly sautéed prosciutto. It’s fantastic. I like this macaroni best using mini penne pasta, but you have so many noodle options here.
While editing the photos I have to say I wish I had selected a different napkin to place beneath the plate. I’m not in love with the pastel paleness of the shots. But I am in love with this recipe!
Lorna Yee’s Award-Winning Four-Cheese Mac-and-Cheese
1 tablespoon vegetable oil
4 strips bacon, cut into 1/4-inch pieces [I made it with 6 slices of prosciutto, chopped]
3 tablespoons unsalted butter, divided
3/4 cup (about 1 medium) finely chopped sweet yellow onion
2 tablespoons flour
3 tablespoons dry white wine
1 1/4 cups half-and-half
1 1/2 teaspoons dried marjoram
3/4 teaspoon chopped fresh thyme
Pinch of red pepper flakes
1/2 teaspoon freshly ground black pepper
1/4 pound fresh, whole-milk mozzarella, cubed
1/4 pound blue cheese (such as Stilton or Roquefort), crumbled
1/4 pound Parmigiano-Reggiano, grated
1/4 pound Gruyère, grated
Kosher salt
1/2 pound pasta, cooked, drained, and kept hot
1/2 cup panko (or substitute regular bread crumbs)
Chives or parsley, for garnish (optional)
Heat the oil in a large skillet over medium-high heat. Add the bacon and cook until crisp, about 3 to 4 minutes. Remove the bacon with a slotted spoon and place on paper towels to drain, reserving the drippings in the pan. Add 2 tablespoons of the butter to the skillet, then add the onions and sauté for 7 to 8 minutes, or until they are golden brown. Stir in the flour and the wine, and cook for 2 minutes. Add the half-and-half, marjoram, thyme, red pepper flakes, pepper, mozzarella, blue cheese, Parmigiano-Reggiano, and Gruyère. Stir until the cheeses melt into the cream sauce and the sauce begins to bubble and thicken. Taste the sauce and if necessary, season with the salt. Add the cooked pasta, mixing thoroughly to coat with the sauce.
In a small skillet, toast the panko with the remaining butter until it is golden brown and crisp. Season with a tiny pinch of pepper and salt, if desired.
Spoon the pasta into big bowls and top with a generous amount of panko and a
sprinkle of bacon. Garnish with a few snipped chives, if desired.


Filed under: Photography
These are on my dining table, they’re beautiful, and they make me happy.

I have already professed my love for risotto, and I think I have found a nice option to make for my mock cookbook. Over the weekend I hosted a risotto night for my in-laws, and one of the risottos featured prawns and asparagus (the other was a divine mushroom and four cheese). It’s not only delicious, it’s also visually appealing, so it is officially a contender. Unfortunately I didn’t get any shots before the dish was finished off this time.
This very standard risotto recipe is modified slightly from a Rachael Ray cookbook.
The Best Basic Risotto
Risotto is best right off the stove. Any toppings should be prepared beforehand or simultaneous to cooking the risotto so they can be stirred in and warmed just before serving. This recipe serves four as a main dish.
4 to 4 1/2 cups chicken or vegetable stock
2 tablespoons butter
1 tablespoon extra-virgin olive oil
1 medium onion, diced
3 cloves garlic, minced
1 1/2 cups arborio rice
1/2 cup dry white wine [I use Sauvignon Blanc]
3/4 cup freshly grated Parmigiano-Reggiano
Kosher salt
Freshly ground black pepper
Simmer the chicken stock in a medium pot and keep warm over low heat.
In a deep skillet or Dutch oven, melt the butter into the olive oil over medium-high heat. Add the onions and sauté for 3 minutes. Add the garlic and sauté until fragrant, about 30 seconds. Add the rice, stir to coat, and sauté for 2 minutes. Pour in the wine, stirring to incorporate, and let it cook away for 1 to 2 minutes.
Reduce the heat to medium. Add the warm stock into the rice about 3/4 cup at a time over the next 18 to 20 minutes, stirring it into the rice and watching for the liquid to be just fully absorbed before adding more stock, every 2 to 3 minutes. Taste a few pieces of rice after 16 minutes to check for softness with a hint of chew. Stir in the Parmigiano-Reggiano, season with salt and pepper, and serve immediately.
For prawn and asparagus risotto:
2 tablespoons butter
1 pound uncooked tiger prawns, shelled, deveined, and chopped into pieces
Juice of 1/2 lemon
1 pound asparagus, trimmed and chopped into 1-inch pieces
Melt the butter in a large pan over medium-high heat. Add the prawns and sauté, stirring occasionally, until just pink and cooked through, about 4 minutes. Sprinkle with lemon juice and reserve.
Steam the asparagus until crisp-tender, about 5 minutes. Add to the reserved prawns.
Drain any juices from the prawns and asparagus, then stir them into the cooked risotto with the Parmigiano-Reggiano.
For four cheese and mushroom risotto (adapted from The Silver Spoon):
1 tablespoon butter
1/2 pound cremini mushrooms, finely chopped
2 ounces fontina, grated
2 ounces Emmenthal or Gruyere, grated
2 ounces crumbled Gorgonzola
Melt the butter in a medium pan over medium-high heat. Add the mushrooms and sauté, stirring occasionally, until soft and browned, about 5 minutes. Reserve.
Stir the mushrooms, fontina, Emmenthal, and Gorgonzola into the cooked risotto with the Parmigiano-Reggiano.
Filed under: City Arts
One of the City Arts recipe assignments I enjoyed the most was Quiche Lorraine. It was fun to prepare and photograph, and although I’m not a big quiche eater, this one was really good. I may make it again with spinach or green onions in place of the bacon to compare.
I got the pastry crust recipe from Epicurious, and it was a real winner. I followed the instructions exactly using my food processor to make the dough, and the result was perfect. I don’t think I could have done it as well by hand. I am wondering if I would have the same excellent results when making my next batch of scone dough that way. I will have to try it out. In any case, I highly recommend this crust recipe for any quiche, tart, or similar baked good.
As for the quiche itself, the amount of time involved lends this to a more special-occasion brunch, but I think you’ll find it worth the effort.
My favorite photo is definitely the quiche slice on the plate. My runner-up is either the full baked quiche or the quiche with a missing slice. (Look at that golden melted cheesy goodness!)
(Recipe and select photos here.)


I own quite a lot of cookbooks, but in the past six months I have been checking out quite a few more from the library—especially the pricier (and generally older) hardcover tomes. As much as I’d love to add all of Thomas Keller’s masterpieces and numerous other gems to my home collection, I can’t quite justify the hefty price tags for many of them, and so I settle for possessing them for a month and trying out whatever I can during that time.
As a Seattle resident, The Herbfarm name has long been a familiar one, though I have never been to the restaurant. (I’m sure it will be a special-occasion destination at some point.) I had of course also come across the cookbook several times, but I had never really sat down with it before a couple of weeks ago.

The cover may be dated, but the recipes and extensive information are definitely not. Any cook who has or wants their own herb garden, or who simply enjoys using fresh herbs from the market during their peak season, will find this cookbook to be an invaluable resource. In addition to an abundance of classic, elegant recipes with an often unique herbal enhancement, the book also contains nearly a hundred pages listing herb varieties and how to grow, harvest, store, and cook with them.
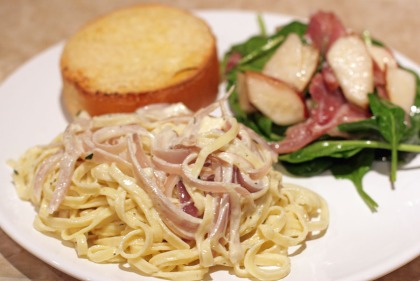
My husband is an avid gardener, so he’s already started my basil and chives, two of my favorite herbs, for this year. I also really love the flavor of thyme, especially paired with creamy sauces, mushrooms, or cheese. Naturally, the recipe that follows caught my eye. It was an unfussy, satisfying, and flavorful pasta dish.
Don’t pay much mind to this snapshot of the meal . . . that evening was definitely a case of me being too hungry by the time we sat down to eat to bother much with setup, styling, or lighting.
Fettuccine with Red Onion, Blue Cheese, and Thyme
4 servings
1 1/2 tablespoons salt
1 large red onion
2 tablespoons extra-virgin olive oil
3 tablespoons coarsely chopped fresh thyme
1/3 cup dry white wine [I always use Sauvignon Blanc in recipes]
3/4 cup heavy cream
1 pound fresh fettuccine, or 12 ounces dried
3/4 cup (3 ounces) crumbled blue cheese or Gorgonzola
Freshly ground black pepper
Fill a large pot with water, add the salt, and bring to a boil over high heat. Peel the onion and cut it in half from root to tip. Cut out the dense core at the root end and slice the onion 1/4 inch thick, again from root to tip. Heat the oil in a large skillet over medium heat. Add the onion and cook, stirring very often, until the onion begins to soften but still holds its shape and has some snap when you bite into a piece, about 4 minutes. Add 2 tablespoons of the thyme and the wine, and let the mixture boil for a minute or two to evaporate. Stir in the cream and remove the pan from heat.
Stir the pasta into the boiling water and cook until tender but still firm, 3 to 4 minute for fresh pasta. Meanwhile, bring the sauce to a simmer. Drain the pasta and add it to the skillet. Sprinkle with the blue cheese and toss until about half the cheese melts into the sauce but small pieces remain. Taste and add black pepper and additional salt. Transfer to serving bowls or plates and sprinkle with the remaining thyme. Serve immediately.
————
A few of the other recipes I must try:
- Chanterelle and Corn Chowder with Basil
- Grilled Figs with Thyme Honey and Gorgonzola Toasts
- Braised Chicken with Leeks and Porcini
- Herbed Focaccia
- Apple, Rosemary, and Caramel Shortcakes
Filed under: Uncategorized
As I read through my March issue of Cooking Light I came to the article titled “The 25 Most Common Cooking Mistakes” and dug right in to see how many I’ve made in the past (and hopefully learned from/don’t make anymore). The article serves as a good reminder for what not to do, and a lot of the mistakes come down to simple impatience.
The majority of my own errors have been a result of rushing or mistiming, though in general I try to relish the preparation/cooking process in a zen mental state and allow myself plenty of time (my tummy doesn’t always obey).
I have definitely been guilty of all but a few of these errors at some point, though most were years ago, before I really got a feel for cooking. Regardless, it never hurts to be more cognizant about avoiding the pitfalls that can mean the difference between a decent outcome and an amazing one.
I learned the hard way to be sure and read the entire recipe (especially watching for marinating/cooking times in the instructions) after misjudging the involvement of numerous dishes based on the first few sentences. I still regularly oversoften butter by heating it in the microwave for just a hair too long (I’m trying to plan ahead better). I have only in the last year picked up the art of “lightly spooning” flour to get a more accurate measure, and due to my baking failures I have gone to using weight almost exclusively when available. And I regularly underbake things because I like moist, just cooked centers, but this doesn’t always work out for me, and I have had to return the pan to the oven after it has cooled (and proved too undercooked) on several occasions.
My biggest error and improvement: I used to fuss with/interrupt cooking food frequently and wondered why nothing ever browned or caramelized like it should. It was a friend of mine who commented on this major rookie error, and since taking that to heart my meals have been exponentially more delicious. (I haven’t ever felt comfortable passing this tip along when I see other people fussing over a pan though . . . I’m not sure it would be received as anything but criticism.)
I hope the article proves useful!
Filed under: Recipes
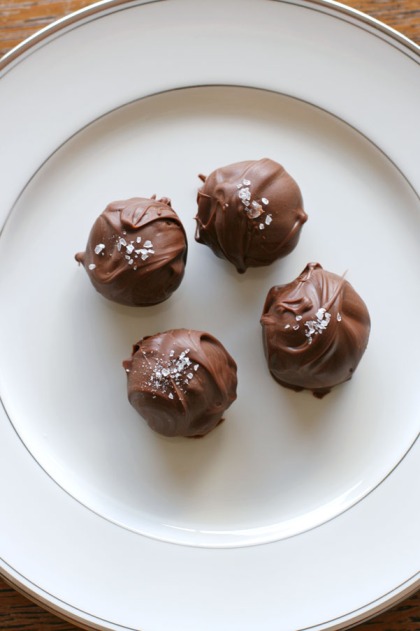
This recipe is courtesy of Pioneer Woman, and the second I read it last October, I bookmarked the page to make the truffles immediately. Oh my are they good. So good that my dad asked me to make him an entire batch as his only Christmas gift. (I did.) They’re also very easy to make, though I suggest a setup that allows you to roll the dozens of little truffle balls (as well as when coating them) in front of the TV to avoid boredom.
I followed the recipe exactly (including her specific Ghirardelli baking bar combination for the truffle centers) aside from one difference: instead of using a generic meltable chocolate for coating the truffles, I made mine with melted Ghirardelli milk chocolate chips. So worth it.
The second time I made them I used a splash of Cointreau in place of the vanilla extract, which I really liked. Also, for both batches I’ve done half with sea salt and half without. I think they are great both ways, and some people aren’t keen on the salt with chocolate thing, so you’ve got that covered. Unless you eat them all yourself, that is. I wouldn’t blame you.
I will make these again and again. They really are a perfect homemade gift and an excellent choice for parties.
I’m pretty pleased with these delectable photos, which are from my first truffle batch about five months ago.
