Filed under: Scone Hunt
Before I approached the scone testing, I did a fair amount of research into what makes for an excellent scone. I read recipe after recipe trying to nail down the common ingredients and what made the variations stand apart. Once I felt like I had a good starting point, I dove in and started baking.
My first attempt was decent. It was a learning experience, specifically for what to expect of the dough, the length of baking (and scone hue), and such. I had selected a heavy cream scone recipe because the tea room scones had a soft, almost cakelike quality, and I was looking to replicate that dairy-based creaminess. I therefore avoided scones that had similar ingredient ratios as biscuits.
The heavy cream scones were pretty good (mine looked nearly identical to those pictured), but not quite right, and not close enough to bother pursuing further with modifications. One down.
A couple of weeks later, I tested a recipe that featured sour cream as the dairy ingredient. I had heard several times that sour cream lends an excellent moistness to baked goods. I felt a little more comfortable handling the dough, and much to my surprise, when I tasted one of the scones, it was very close. The sweetness was off, and there was a hint of an aftertaste, but the results were promising. I wasn’t ready to break out my jars of cream just yet, but I now do believe that the tea room scones contain sour cream or something similar to achieve the consistency I’m after.

I cut them a little too large, but even only making half a recipe, there were way too many for just me. Below is the half recipe I made with a few of my own modifications. (The original recipe is here.)
The Best Scones. Ever. [Note: Not my title.]
1/2 cup sour cream
1/2 teaspoon baking soda
2 cups of flour
1/2 cup granulated sugar
1 teaspoon baking powder
1/2 teaspoon salt
1/2 cup (1 stick) unsalted butter, cut into pieces
1/2 egg [I admit, this was tough. I cracked and lightly beat it, then tried to figure about half.]
1 teaspoon heavy cream
1/8 teaspoon vanilla extract
Preheat the oven to 350 degrees F.
In a small bowl, stir the sour cream and baking soda to combine.
In a large bowl, whisk together the flour, sugar, baking powder, and salt. Cut the butter into the flour using a pastry cutter or by pulsing in a food processor until the mixture resembles coarse crumbs. Add the sour cream mixture, egg, heavy cream, and vanilla into the flour mixture, and stir until just combined.
Turn the dough out onto a lightly floured surface; divide the dough and pat into two thick circles. Cut the circles into four or six wedges, position on a nonstick baking sheet, and bake until the bottoms are golden and the tops are just slightly browned, about 16 minutes.
———-
As for my third attempt, I almost can’t call it a true scone effort: I was pretty sure the results would not be ideal since they were from a mix, not from scratch. I was right. I had received a Harry & David scone mix for Christmas and decided I might as well use it on the off chance that it really was incredibly amazing. (I was pretty skeptical when the mix called for just water to be added rather than milk or additional ingredients.) The scones were fine, but they were very biscuit-like (as can be clearly seen in the photo), so I had a couple and then handed off the rest.

I certainly feel like I’m on the right track with that second attempt, and it’s nice to have hope. I have just finished my fourth batch—report to come in a future post—and yes, I am getting awfully tired of eating scones . . .
Filed under: City Arts
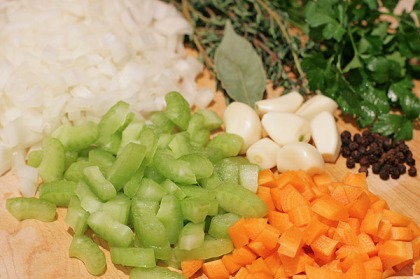
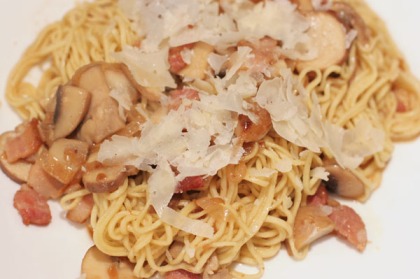
Another excellent recipe I tested and shot for City Arts was homemade mushroom stock. With this I made a mushroom sauce for pasta, and oh was it good. This stock is similarly great for making a risotto (especially this one) or soup where homemade stock really highlights and enhances the flavor of the dish.
I’m also pretty pleased with this batch of photos, and felt during this shoot like I was finally getting the hang of in-camera adjustments to compensate for my kitchen lighting and photo tone/color. I still have plenty of off days (usually it reflects a lack of patience with getting the shot . . . often because I’m hungry!), but I hope to keep moving in the right direction. My favorites of the bunch are the strained stock and the plated pasta.
(Recipe and select photos here.)
Note that the only difference between the recipe and my stock is the addition of a leek, just because I had one.


Filed under: Recipes
A few weeks ago I was in a baking mood, and I decided on a coffee cake, for no particular reason aside from trying something new. It turned out pretty well, though I expected the top to brown a bit more. The moist consistency and sweetness of the cake was just right.
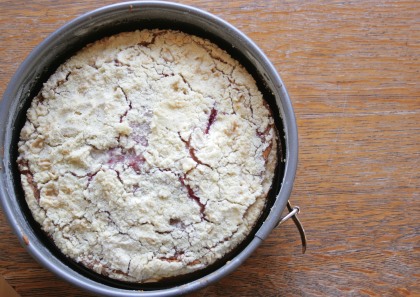


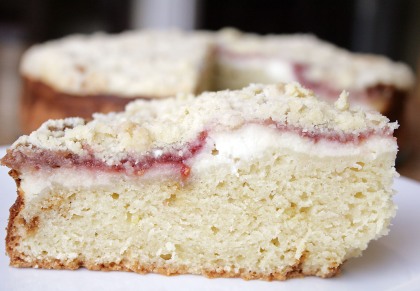
This recipe comes from Breakfast in Bed by Carol Frieberg.
Raspberry Cream Cheese Coffee Cake
2 1/2 cups all-purpose flour
3/4 cup sugar
3/4 cup (1 1/2 sticks) cold butter
1/2 teaspoon baking powder
1/2 teaspoon baking soda
1/4 teaspoon salt
3/4 cup sour cream
1 egg, lightly beaten
1 teaspoon almond extract
Filling
8 ounces cream cheese
1/4 cup sugar
1 egg, lightly beaten
1/2 cup raspberry jam
Preheat the oven to 350 degrees F. In a large bowl, combine the flour and sugar; cut in the butter until the mixture resembles coarse crumbs. Remove 1 cup of the crumbs and reserve for the topping. To the remaining crumb mixture in the bowl, add the baking powder, baking soda, salt, sour cream, egg, and almond extract. Mix well. Spread the batter in a greased and floured 9-inch springform pan.
For the filling, in a small bowl, combine the cream cheese, sugar, and egg. Spread evenly over the batter in the pan. Spoon the jam evenly over the cream cheese filling.
Sprinkle the reserved crumbs over the jam. Bake for 1 hour, or until the cream cheese is set and the crust is a deep golden brown. Cool for 15 minutes, remove the sides of the pan, cool completely, then serve.
A great skill-development project occurred to me this morning, and I thought I’d share. It would be fun and challenging (and motivating) to create my own “cookbook” by selecting recipes, doing a formal photo shoot for each dish, and then flowing the final content into InDesign to use as a portfolio piece.
The recipes could come from multiple sources since it’s for my purposes only, though I think it would be best if they were from cookbooks or websites that did not already have a photograph of the finished dish, so I wouldn’t have any reference/bias for styling my final shot. Obviously it would be ideal for them to be recipes with ingredients I especially enjoy and won’t mind making a couple of times as needed.
I’m thinking twenty-five recipes with photos or thereabouts. Since I would be selecting recipes without existing photos, I might have to do a fair amount of testing to determine which ones will result in interesting and diverse finished dishes. I could start scoping out kitchen shops, Goodwill, etc. for inexpensive props/dishware that could be used in the shots as well.
And in the vein of a typical cookbook, I would expect to end up with a handful of appetizers, a couple of salads and at least one soup, some main dishes (perhaps lighter lunch fare as well as full-on dinners), a few desserts and/or baked goods, and maybe one beverage.
This isn’t something I would do all at once on a short timeline, but perhaps over the course of the coming months (maybe with a final deadline of July as a mid-year goal) I could document my process here and get feedback on specific recipes and photos contending for final selection.
I’ll be looking through some of our older cookbooks at work as well as those I have at home, but I welcome and appreciate any suggestions you might have for cookbooks to check out, web recipes, or dishes you think would photograph well. Thanks and wish me luck!
Filed under: City Arts
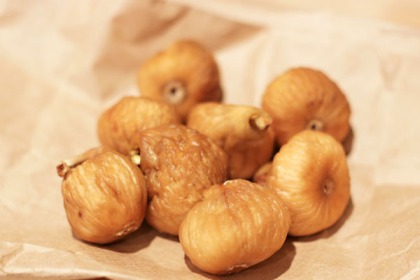
The next installment of the City Arts recipes is a warm salad featuring figs and oyster mushrooms. Now, Seattle is a fantastic place to find unique ingredients year-round, but for whatever reason I had the most challenging time finding a stand or grocery that had dried figs or oyster mushrooms in stock. I finally did, and the effort paid off.
This is a lovely starter salad, and I especially enjoyed the particular flavor and texture of the oyster mushrooms—to substitute them is to change the salad entirely.
(Recipe and select photos here.)
The yellow cast to the photos is something I’m working to eliminate as I improve as a photographer. Part of the problem is using a Canon DSLR (which tends to shoot in warmer tones) but the bigger issue is the lighting in my kitchen. There’s only a small window to allow natural light (plus these were taken at night), there are spotlights high above in the ceiling, and as of yet I haven’t used any secondary lighting as a filler or to offset others.


Filed under: Recipes
I’ve long been a huge fan of Italian food, and risotto has a special place in my heart. I believe the first time I had risotto was at Nell’s Restaurant at Green Lake about six years ago (if I had it before that, it wasn’t memorable). I fell fast and hard. Then I attempted risotto at home using a very basic Rachael Ray 30-minute recipe, since it seemed like the easiest way to give the process a try. Turns out it’s a solid base recipe that I have used many times since.
A few weeks ago I took on a more involved and flavorful risotto preparation (courtesy Bon Appétit), and it brought me back to that very first dish (which also featured leeks). I can safely say that this was one of the best risottos I’ve ever had, and certainly the best I’ve made at home. It was rich and creamy beyond words.
I paired it with an arugula, prosciutto, and pear salad with champagne vinaigrette and crusty French bread (of course).

If you have any love for risotto (and especially if you’ve never had it!), you should run home and start making this right now. Many home cooks are concerned about the time involved and worry it’s too difficult, but in reality, risotto is just one of those dishes you need to attend to while it’s cooking. As long as you can avoid multitasking while stirring in the batches of broth (I recommend having everything else ready to go before starting), you will be rewarded with a perfectly cooked (and absolutely heavenly) meal.

Risotto with Leeks and Shiitake Mushrooms
I keep a small bottle of white truffle oil in my refrigerator at all times because I love to put a little on french fries, etc., but you could leave it out. It does add an extra boost of delicious flavor though. This makes about 6 hearty servings, plenty for a small crowd or leftovers for a couple of days.
Mushrooms
1 pound shiitake mushrooms, stemmed, cut into 1/4- to 1/3-inch-thick slices
1 large onion, halved, thinly sliced lengthwise
1/4 cup (1/2 stick) butter, melted
1 tablespoon white truffle oil
1 teaspoon minced fresh thyme leaves
Leeks
2 large leeks (white and pale green parts only), halved, thinly sliced crosswise (about 2 cups)
3/4 cup whipping cream
Risotto
4 tablespoons (1/2 stick) butter, divided
1 large onion, chopped
1 1/2 cups arborio rice or medium-grain white rice
1/2 cup dry white wine
5 cups (or more) hot vegetable broth [for extra mushroom flavor, use homemade Mushroom Stock]
1/2 cup grated Parmesan cheese
Preheat the oven to 400°F. Toss all of the mushroom ingredients on a rimmed baking sheet. Sprinkle with salt and pepper. Roast until the mushrooms are tender and light brown around edges, stirring occasionally, about 45 minutes. Can be made 2 hours ahead. Let stand at room temperature.
Meanwhile, bring the leeks and cream to boil in heavy medium saucepan. Reduce heat to medium and simmer until the leeks are tender and the cream is thick, stirring often, about 15 minutes. Season with salt and pepper. Can be made 1 day ahead. Cover and chill. Rewarm before continuing.
Stir in the leek mixture, mushroom mixture, remaining 2 tablespoons butter, and Parmesan. Transfer to individual bowls and serve.
Filed under: City Arts
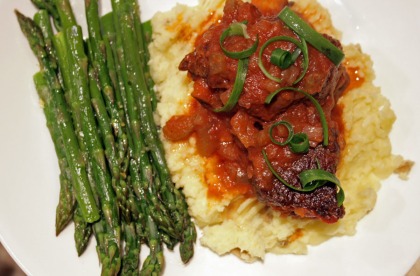
The second recipe I photographed for the City Arts Magazine blog featured beef short ribs, which I had actually never cooked before. Oh were they good, and the husband was a very happy man.
I highly recommend this dish, especially as a fairly simple meal that is sure to impress. It’s one I will go back to again and again.
All the photos I took follow. Recipe and select photos are here.
For this set my definite favorite is the browned ribs on the plate, followed by the first plated shot. Your thoughts?



Filed under: Books
I have read Molly Wizenberg’s Orangette blog off and on for a couple of years, though honestly I was pretty late to it. (I’m not exactly hip to the latest web/blog trends.) I heard that she had a book, A Homemade Life, and that it was really lovely, so I bought a copy soon after its release last March. It sat on my shelf for many months while I planned a wedding, honeymooned, worked a ton, and kept up with my monthly book club selections. Around the holidays I had a chance to select a book from the shelf to read just for me. I chose Molly’s.

It’s a wonderful book—well written, sincere, and engaging. Since I have never gone back to the start of Orangette, I didn’t know a lot of the backstory as far as why she started writing, or where her love of food stemmed from, or how she met her husband, with whom she recently opened Delancey. The book gave me all of this, though, and even though I know a number of the pieces in the book come directly from related posts on the blog, there is something the book provides that a blog can’t, since one is rarely plotted carefully from start to finish. There is a beautiful narrative flow to her stories, to her life, that work really nicely in chronological order in this compilation. The book begins with her childhood and her father’s influence in her life and ends with her falling in love with the man who would be her husband. The reader gets glimpses of her family, her travels, her meals, and her love life via her very natural, fluid storytelling.
The essays in A Homemade Life are quite brief (most are around 6 pages, including recipes), much like a blog post, which fits perfectly given how Molly made her writing name. It makes the book highly readable and easy to spread out over a longer period of time, indulging in a story here and there as time allows. It also made me, at least, keep wanting to go back to the book for more, and I didn’t want it to end.
While reviews on the whole are glowing, I was a little surprised to see some negative comments by readers asking why would they ever care about her life? I can’t imagine these people enjoy reading autobiographical writing/blogging much at all in that case, and the book isn’t a good choice if that’s so. Others called it too sentimental, though I would say it’s more a romanticized reflection on the past, and an endearing one at that. (I don’t think she’s likely to have an enormous male audience, however.) And it is true that a number of the essays and recipes appear on her blog in some form, though they are dispersed over several years of entries. In any case, if her posts keep your interest, the book is a worthy expansion. It will be released in paperback in late March.
To finish off, here are a few of the recipes from the book that especially caught my eye (none I’ve made yet), some of which are available at Orangette:
- Coeur à la Crème with Raspberry Purée
- The Winning Hearts and Minds Cake
- Zucchini with Pesto Noodles
- Coconut Macaroons with Chocolate Ganache
- Butternut Soup with Pear, Cider, and Vanilla Bean
- French-Style Yogurt Cake with Lemon
Filed under: Scone Hunt
I am obsessed with a very specific scone.
This may appear to contradict my claim that I don’t care much for breakfast, but I swear this recent obsession was very unexpected.
I wouldn’t even call myself a fan of scones in general. I have probably tried about a dozen varieties at different times in my life, such as when I’ve been in a situation where I need to grab something quickly from a Starbucks, bakery, coffee shop, etc. I’ve been pretty disappointed in most of the scones I’ve eaten, usually because they were dry, crumbly, and filled with dried fruits or nuts. They haven’t done much for me in the past, and thus a croissant or other pastry is my go-to in similar situations these days.
Enter a birthday gift from my mother-in-law to visit The Secret Garden Tea Room last July. We enjoyed their many varieties of tea and delicious lunch offerings, all of which come with one of their homemade scones. I ate mine and was blown away. It was moist and dense and just a little sweet (and unadorned). It was without question the best scone I had ever had, and beyond that, I wanted more. I decided to purchase a box of three to take home; they package them with lemon curd, Devonshire cream, and jam—all made on the premises and also incredible. I happily gobbled them up the following three mornings (lucky for me, my husband doesn’t like scones at all). And then I sort of moved on.
However, because we had such a nice time there, my MIL suggested we begin an annual Christmastime tea party tradition with the girls in the family. So the first week of December we made another trip, and of course I was looking forward to the scones for weeks beforehand. I already knew I would be purchasing another box to go. And the scones were even better than I remembered. From that point on I have hardly been able to stop thinking about them when compared to my otherwise uninspiring breakfast options.
Naturally I called the shop and explained that the nearly hour drive each way was pretty inconvenient for regular visits, and was there any way they might be willing to share the recipe? (I promised it was for my own home use.) No, I was told they would not reveal it. (The woman did kindly confirm that they were made in-house from scratch, not using a mix.) Disappointing to say the least, but obviously it is perfectly within their right to keep it secret.
I may try again, asking if they could give me a list of ingredients without exact measures just to put me on the right track for experimenting, but I suspect I’d have to be especially charming and get the right person on the right day, so we’ll see.
In any case, I have made three batches of scones to date (recipes and photos to come in future posts) in an attempt to uncover a match. When they don’t approach greatness, it’s pretty tough not to lose interest, and I usually give most of the batch away. I’m not sure if I’ll ever get it exactly right, but one of the recipes was very close, so there is hope. I’ve considered purchasing a dozen of the real thing, tasting and retasting, and attempting batch after batch of my own until I’m satisfied. I don’t know any professional bakers personally, but I sometimes wonder if one might be able to determine the real recipe by eating one of the original scones. That would be pretty cool.
I will continue on my quest for a scone with just the right moisture, texture, and sweetness, until I get sick and tired anyway. I have listed some potential contenders in The Great Scone Hunt links sidebar. And when I uncover the most worthy of the bunch, I will smother them with the very reasonably priced imported Devonshire and clotted creams I bought from English Tea Store just for that purpose. I can’t wait.

Filed under: City Arts
For about a month now I have done recipe testing, editing, and photography for a longtime friend currently working at City Arts Magazine. Even from doing just four recipes so far, I can see my photos changing. I’m getting a little bit better with capturing even, natural light and truer color/tone. Obviously practice makes perfect (or closer, anyway), and the assignments and related exposure have been very motivating for me to keep at it and work hard. My ultimate goal is to spend as little time post-processing as possible (i.e. getting it correct in the camera).
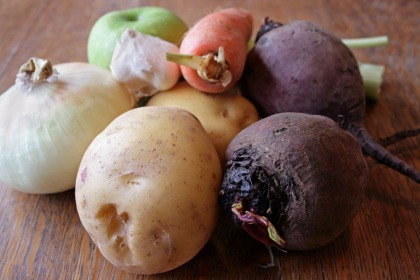
I have not tried a bad recipe yet, and this Vegetarian Borscht is no exception. It’s a bit messy of course (wear dark clothes!), but boy is it tasty. It’s pleasantly tangy and quite filling.
Since not all of the photos make it onto the City Arts blog, I’m sharing them here. Recipe and select photos are here.
I think my favorite of this bunch is either the beets or the finished borscht with cream. What about you?
